Monday, December 16, 2013

Sawtooth Shirt Quilt

The Sawtooth Shirt Quilt began as part of the first shirt quilt, as you see in this photograph of my sketch on the felt wall. With some help from my advisor, I avoided  ruining the soft look of the curves in the Wave Shirt Quilt with these bold graphic sawtooth strips. They were set aside for a second project which is finished this week. 
Wave Shirt quilt with sawtooth strips on felt wall
I had a lot of sawtooth made out of three repurposed shirts, a blue-gray linen and the burgundy and white shirts from my pals Tom and Peter.  The sawtooth strips are edged with long vintage printed gold fabric and some wider blue or more burgundy shirt fabric. To make the second design I went looking in my pile of yardage fabrics, where I found a blue and orange-gold homespun plaid, also a thrift store find, that seemed to work into the color scheme quite well. This homespun looks and feels like a shirt fabric making a nice complement to the others from real shirts. Then, I wanted something to lighten the whole picture and realized I had some natural beige linen that would be a nice soft light to add to the mostly dark composition. Beige linen makes a good resting spot for the eye as well as a place to show off the hand quilting in the overall design. This top finished up being 8 inches taller than the Wave Shirt Quilt because I had so much of the sawtooth strip made. Since I was thinking about my friends who inspired the quilts the differences in the two men felt like they are reflected in the different designs using their shirts.
Finished Sawtooth Shirt Quilt. 46"x 68"

On the back again in a thrift store I found a beautiful burgundy cotton sheeting and I had solid burnt orange yardage that together would make this quilt back a little different from the Wave Shirt Quilt while a little the same. I was lucky to find a rusty orange perle cotton #12 at Suzzie's Quilt shop in Manassas to complement the homespun plaid and set to work quilting straight away.
back of the Sawtooth Shirt Quilt
For the quilting design I chose to follow the 45 degree angles in the saw tooth's half triangle squares as my pattern lines. It was a coincidence that they were going in opposite directions on the two sections of the quilt top. When I finished basting the layers of cotton, linen top and back together with a fine wool batting, I used the Hera tool with a long metal straight edge to mark diagonal lines across the majority of the top, then shorter lines in the other direction making a arrow point angled design where the two sections meet. 
label is hand embroidery on a blue-gray linen scrap including the content to help advise for cold water wash and low temperature drying.  

Sawtooth Shirt Quilt 46"x 68"


Wave Shirt Quilt finished 46"x 60"

side by side two quilts made from Tom, Peter, my father Clarence and some anonymous fellow's shirts.


Saturday, December 14, 2013

Shirts become quilts

I have always considered recycling a noble idea and in quilt making it adds a layer of emotional connection to the projects if you have fabrics from special people in your life. It isn't always so easy to get it but the opportunity crystallized when I heard my pals Tom and Peter had a bag full old shirts waiting to be donated to Good Will. I offered to take them to donate, in exchange for a chance to select out what I wanted for quilting. They accepted the deal and I picked up the bags. I had them a good while before I was ready to use them.
shirts cut and hung for the first time on felt design wall

Then began my struggles of finding the way to use these many varied sports shirts. They are almost all made from heavier fabrics than is not normally used for quilt piecing. The colors are varied and each one has a nice hand. I began by cutting off the cuffs, collars and heavy seams leaving all the shirt shaped parts and pieces. Then I started hanging various pieces of them on the felt design wall. That was a surprise, none of these fabrics would cling to the felt, I had to pin every corner to make them stay up.
Still it was interesting to see the shapes that were part of the old shirt construction. I looked and studied and fiddled with them, moving them a little less than usual due to the hanging problems. Then an idea came to me: perhaps it was time to try a curved seam using the curve of the sleeves where they meet the shoulder. It wasn't difficult to sew a long gentle curve. The curves became a new design element, a new way of seeing the surface gently softened but it added a challenge beyond the curved seams. Later piecing in the angled intersections of the stacked triangle shapes. It was sort of like a very wide Y seam but with four pieces at four angles. 
With some help from my resident advisor, we decided to remove the plaids and work with the solid colored shirts and one striped fabric from one of my father's flannel shirts that was a color theme match. Burgundy, creamy white and the stripes needed a little more fabric to finish.  I went hunting at Salvation Army Store where I found a huge steel blue-gray linen shirt. It worked into the design as a break between the matched sets of burgundy and white sleeves.
experimenting with the new curves on the design wall. This shows where four angled seams came together to fill in the missing triangles in the center. 
Once the blue-gray shirt and stripes were inserted between the white and burgundy the insert looked too wide. Eventually I was inspired to add an S curve and flip the center section to break up the wide area of blue and stripes. Using a home made paper pattern for my big S curve so both sides of the S were the same curve shape when they were flipped helped keep the curves equal.
paper pattern used to match cutting the long S curves
The curve was a nice addition to the open space that was a little boring before I flipped that section and it added more curves to expand the original design idea. Some of the remaining shirt fabric made a long string of traditional "sawtooth" using blue and burgundy and white edged with cheddar cloth from a vintage line of quilters fabric that happens to match a tiny line of gold running through the striped shirt fabric. Making sawtooth strips for the first time was a delight. Even using linen and moleskin fabric to make them, if a little more difficult, wasn't a barrier to my joy as it came together.
before adding the S curve in the center section and with the sawtooth strips. 
Initially the plan was to use these sawtooth strips as part of the curved top design. Then again with some help from my resident advisor I realized that the sawtooth strips powerful graphic design overwhelmed the soft curves. He casually suggested to take those out and use them for another quilt. After a night's sleep on the idea, I loved it. Realizing I can make a second quilt that is totally different using some of the same fabrics felt like an exciting complement to this quilt. I continued the curvy top by adding stripes of all the colors in the 4 shirts around the edges of the central sleeve area to finish  this quilt I now call the Wave Shirt Quilt.   
quilting with ecru white perle cotton #8 which I then repeated with navy blue in between the white lines. 
The same big S paper pattern worked nicely to mark the curved quilting lines across the entire quilt with my favorite Hera tool.  It's filled with a nice warm wool batting and the back is a soft burgundy cotton sheeting. The label on the back is hand embroidery with white perle cotton on the blue-gray linen patch. It is bound with solid navy blue cotton.

I hand quilted alternating lines of ecru white and navy blue perle cotton #8
Label embroidery patch
completed Wave Shirt Quilt 
detail of blue and white quilting 

finished Wave Shirt Quilt 46" x 60"
Stay tuned for the Sawtooth Shirt Quilt reveal coming soon. 

Wednesday, November 27, 2013

New quilt

detail of my newest quilt, Coded Connections
This year I have been playing with the ideas of Gee's Bend quilters and the concept of modern art influenced design. I began piecing, putting together pieces of fabric, two years ago in earnest with the little scraps of fabric from my big yo yo project that took 40 years to complete. I saved lots of little diamond pieces and eventually pieced many of them into little strips of squares, by hand at first, then with the featherweight Singer machine. It led to the Fairhaven Cliffs Summer Quilt 2011. That was all intuitive and challenged my color theory and subjective choices of patterns and prints looking for combinations that pleased my eye. In between there was the Rose Star English paper piecing madness that possessed me for about a year... before the rose star was done I moved to a more freestyle designing my own block I called the Williamsburg fence design. That was built using a set of dark green solid fabric with natural muslin. Working on that small quilt is when I began to realize I wanted to do repeating patterns building blocks that would add up to a full bed sized quilt. I got carried away with the Rose Star quilt and finished that then came back to the green and white design for this new quilt.

Yo yo coverlet, 40 years of little circles full of memories 

Patchwork pieced with scraps of Yo Yo quilt became the Fairhaven Cliffs Summer Quilt 

Rose Star quilt English paper pieced all by hand. 


Green and muslin strips become my play time project inspired by Williamsburg's white fences and boxwood hedges 
On the felt wall are various blocks made from the green and white fabrics exploring how cutting and reassembling the strips made new patterns
My first finished machine quilted throw photographed by Elle from DC Modern Quilt Guild at NGA sculpture garden 
The resulting play with that set of green and off-white strips developed into the latest finish titled Coded Connections. I used the same green and off-white muslin and developed a fun playful pattern without repeats but echoing the Williamsburg Fence quilt by interval and color. During the months I struggled with this idea of a modern abstract design I kept thinking I needed a third color like red or orange or magenta and I experimented over and over with them and kept rejecting the high contrast that came from those colors until one day this bamboo green solid got hoisted to the design wall and it all of a sudden felt like the shift in tone I needed to complete the color design.  
Coded Connections finished 80 x 83 

 I used a Dark Parrot Green perle cotton #8 thread to quilt it all by hand in straight lines and a solid muslin back where that green would show nicely. The binding is made of the three fabric colors pieced together to reflect the inner design intervals. The batting is simple cotton. I hope to go back to my fence pattern and make a full bed sized quilt one day.
Label close up for Coded Connections quilt
Every time I go back to Colonial Williamsburg I find new inspirations in the formal functional gardens and numerous designs all over the city.
garden fences and greens are really great retreats from the busy streets in old Williamsburg.

boxwood hedges in a garden 

picket fence gate and hedge 

This year the leaves were orange, red and yellow for our visit which is a whole new color theme for a quilted Colonial theme. 

Laundry hanging by an encampment lot at the edge of Colonial Williamsburg was a new site this year. 
 What comes next? currently I am working with used men's casual wear shirts and making progress piecing and patchworking my way to a pair of unique quilts for cold winter nights by the fire. They are being filled with rich wool batting and I hope to finish them both in the next couple weeks.

Thursday, November 14, 2013

wonky star quilts


Wonky Stars and Stripes quilt 
The past month I have been finishing two small quilts. Today I completed them both and they are ready to reveal. Wonky stars are a modern version of a traditional 8 pointed star block redesigned to be a little more relaxed than traditional stars. In a wonky star the points of the stars are at random angles willy nilly as it suits the quilter. I enjoyed making these blocks once I understood how.  I made more than I needed for a DC Modern Quilt Guild block raffle. Our theme was navy blue and white with a bold color. I tried different mixes of prints and solids and decided I liked both but not mixed up as much as I like them grouped together. So then I began making blocks for my own small quilt roughly 4 x 5 feet. I couldn't wait two months for the raffle. I made a total of 40 stars for these two quilts and had five more that I entered into the guild's raffle.
finished wonky stars and stripes quilt 

back showing the stripes 

Wonky Stars and Stripes label 
As I worked on the strong solid colors I experimented with some softer prints and found a new color way with a big yardage of pink plaid fabric my friend and former neighbor Kiley Bednar gifted last summer. It's a salmon pink plaid with little lines of pale blue, lavender, green and white, very soft and more feminine than the high contrast solid navy blue and white quilt. For the pink star quilt I saved up some wool batting to use and decided to hand quilt using a star and diamond pattern.

Hand embroidered label detailing wool and cotton content


Wonky Pink Stars quilt 5 x 4 feet

the back shows two stripes and the hand quilting pattern of stars and diamonds. 


Thanks to former guild president, Katie Blakesley who selected this block and the raffle color theme. She gave us a guide to colors and a link to a tutorial that made it all very easy and fun. Her new book is coming out next month and we are all looking forward to getting copies of our own. She presented her new book about revisiting traditional quilts in a modern way and she spent two years working and writing and quilting with two co-authors. Her presentation in late October to the guild about writing her book on quilting was very interesting and clearly not as easy as one would like to day dream it should be. 

Wednesday, November 13, 2013

Autumn is the Orange season

I am sitting here at my desk on a cold and sunny afternoon. The windows are all aglow with oranges, yellows and reds, hints of brown slowly overtaking the boldest display of colors nature has to show. The experience is so brief but always delivers a joyous burst before the long months of cold when grays are the main color theme. I have been taking photos of the leaves here and there when I go for walks and I have a few to share. I was lucky to go south last week to Williamsburg and Jamestown Va for a visit with my out of town family and friends. We sat by the fire in our rooms and told and listened to stories each of the elders had for us. It's getting harder to go out and make new experiences for some of the gang and just being together and sharing is still an exciting event with so much distance in between our family and these friends. Keith and I love going to colonial Williamsburg and the loop drive at Jamestown the original English colony famous for Captain John Smith and his little friend Pocahontas who married John Rolfe some years later and became the first officially sanctioned bi-racial marriage in the new world. The history in that area is fascinating to me and there are a some really good books that detail the stories for those interested in the colorful details. The designs in Colonial era were heavily influenced by Chinese art and ceramics. I designed a quilt based on one very popular fence detail my father the Architect told me was Chinese years ago. He and his father used it on their home's front porch.  Naturally, I took along a few inside projects, to fill some of my time in the big apartments we were staying in while in Williamsburg. I got one really big quilt top basted together ready to hand quilt and a second smaller one is nearly finished. My next blog post will be about finished quilts.


Brookland's streets full of color before we went south to Virginia

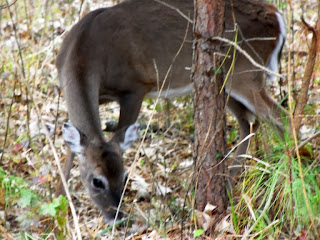
This year numerous deer were seen on the Jamestown Island Loop drive.


James River is tidal and surrounds Jamestown Island


Marsh grasses grow all over Jamestown island 

Sister Jenny, Mildred, Phyllis, Elizabeth and Frank at Jamestown glass blower

Keith with his long lens taking photos on Jamestown Island

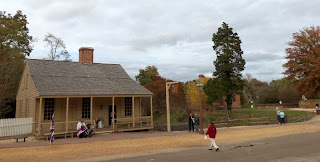
Colonial Williamsburg was nearing peak color in their maple trees 

Yellow berries on a holly tree in colonial Williamsburg. Rare 
Colonial garden center

Lesson in how to make a garden row to plant seeds for winter crops. 


Scarlet oaks one of my favorites 


red house paint colonial style


The new Carlton Coffee House next to the Colonial Capitol was added a couple years ago 

All the formal gardens are open for free in Williamsburg 

Coffee house and costumed folks

bicyclists and girls on a bench lined the Duke's street 


tented encampment on a side yard was doing laundry

One of my favorite gardens has a stream running through with little foot bridges

a new tree to me this pink leaf wonder was only at Ford's Colony where we took long walks on wooded trails. 


more pink orange leaves over head

miles of trails at Ford's Colony made it a perfect vacation place to walk.


The pink tree at the edge of the woods posed for a close up.