A few years ago I joined an Internet group of quilters who swap small blocks and add borders to each then send them off to others to add more rounds until a 6 inch block becomes 24 inches then it is given to the first to lay claim to the block. A nice fellow in Kentucky hosts the block swap sending and resending the blocks from one quilter in the Flickr.com group to the next. Here is a link if you want to see some of the work or join in the fun:
AddABorderBlockSwap on flickr.com
AFter a while in the group I never got to select a finished block so a second option was to keep one you liked and replace it. I chose this block after adding a round to it because I fell in love with the orange/magenta striped background fabric and the hexagon hand pieced block on it that looked like a toy block. It was made by Ed Hart who goes by
Cattail in the group. I chose it as my block to keep and pinned it to my design wall to ponder how to build it into a queen size quilt top of my own improvising from this beginning.
Not long after deciding to keep this block I put it away because I had so many quilt projects already underway and this project was not clearly worked out in my head.
The following year once all my Log Cabin quilts were completed I tried again. This first block built up to about 24 inches square and I realized that to keep going, like some other quilters do making it all a giant medallion, was going to be really difficult to keep my quilt squared. The wobble was starting to distort the square shape after adding only three more rounds!
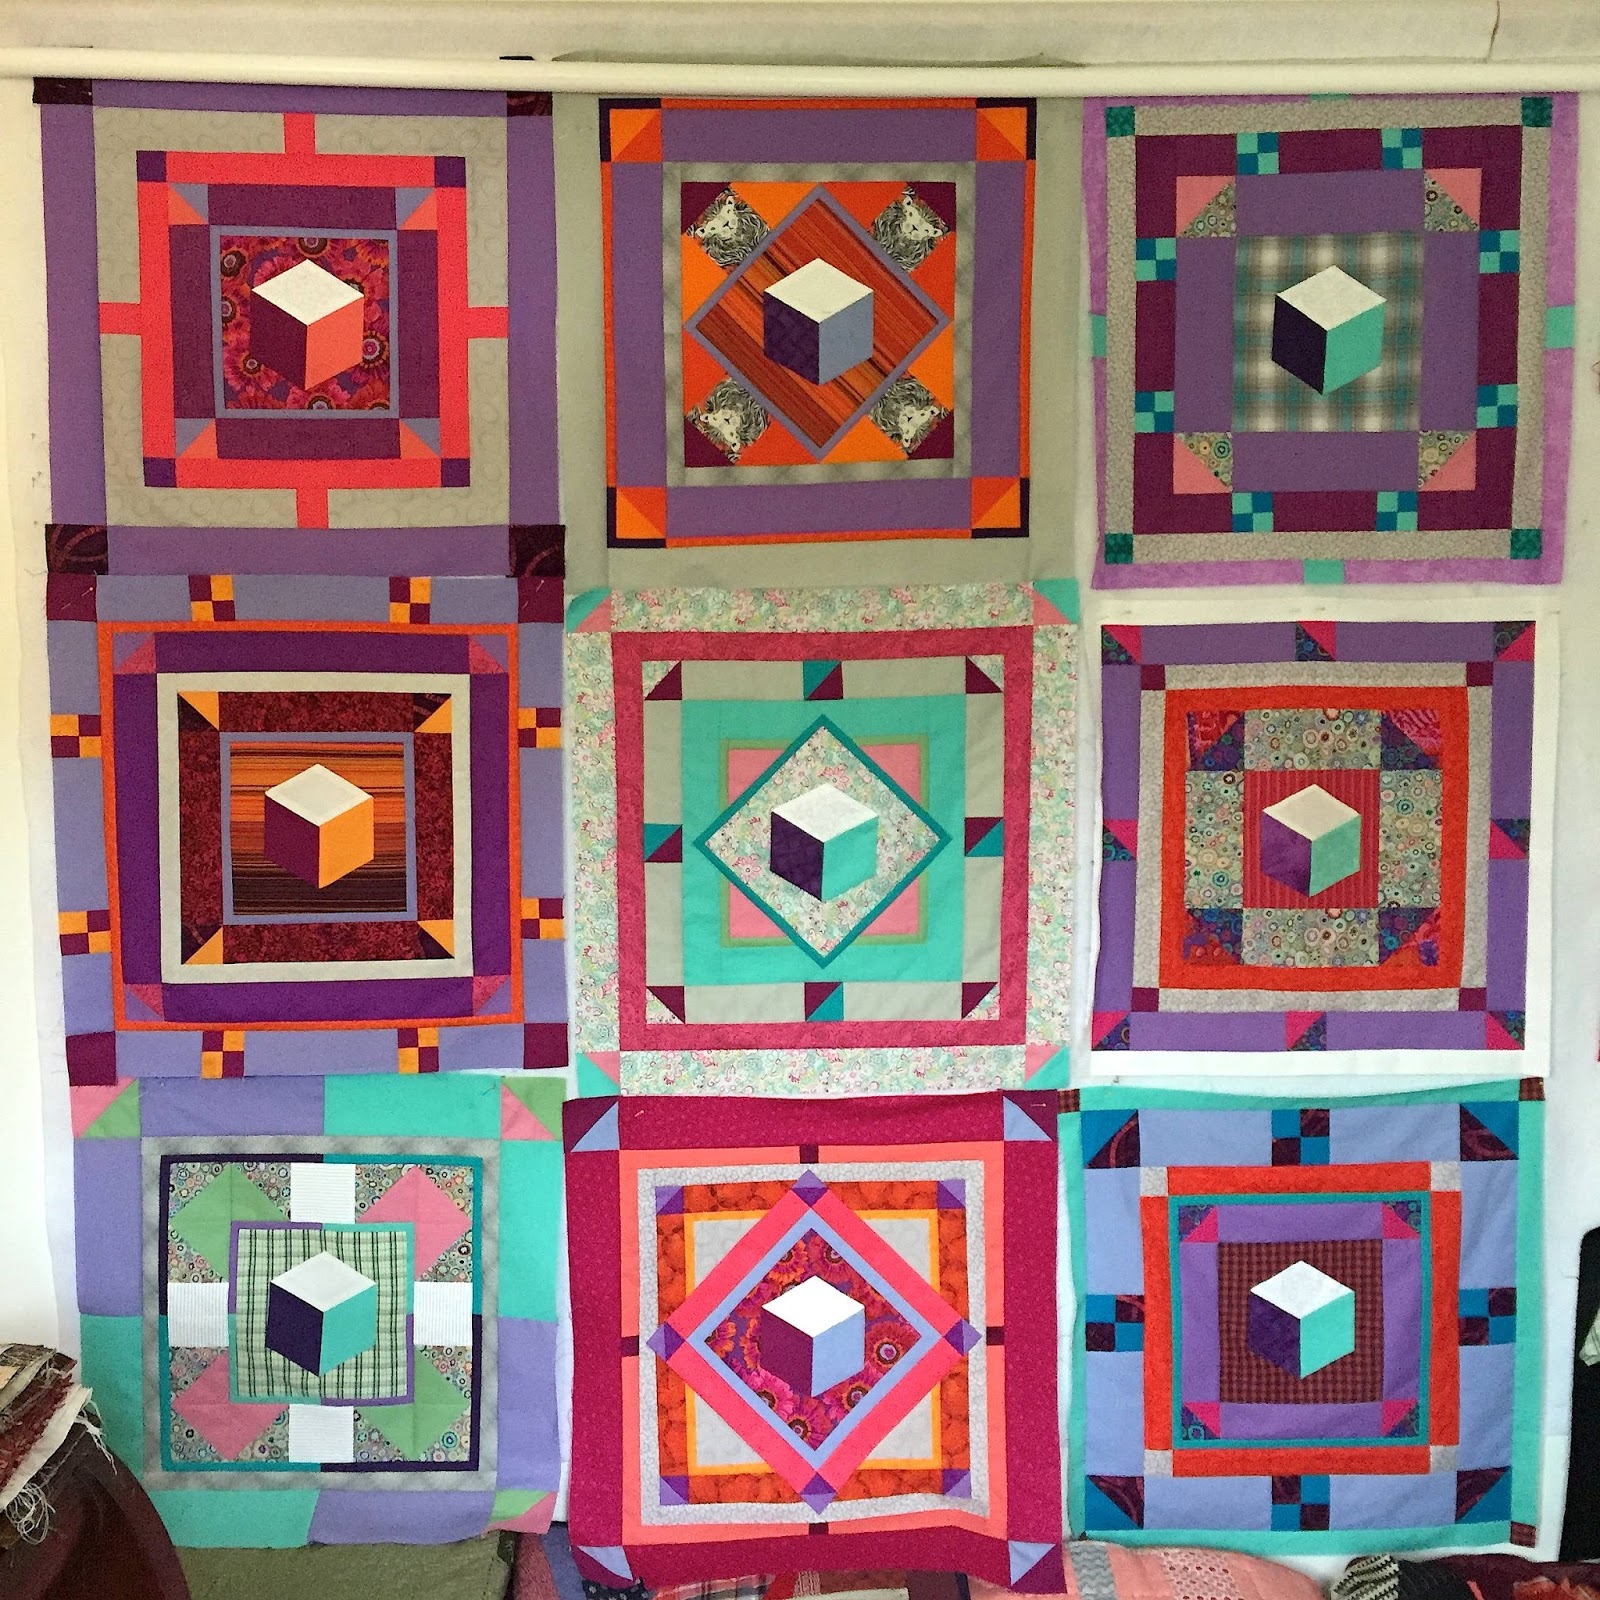
Next idea was to make more blocks like this improvising my way along with my core design element taken from the original block, the three diamond hexagon on a bright background that looks like a three dimensional toy block sitting in a field.
Next step was to make some three inch diamond English Paper Pieces and try to match the fabric of the original block with purple, white and green from my stash. It was fun making them up and hand stitching them together a couple at a time.
The second block was different because the background was different and so it went on and on with each new block. Once I had four I decided I was going to organize them by doing a big nine patch design for the overall quilt pattern.
 |
| Second block used a tartan shirt fabric given to me by Melinda Newton as my background |
The colors shifted to the purple and aqua range and I wanted to keep the magenta, red and oranges in the quilt so I chose another tartan in red and dark blue as the third block's backgrounder.
 |
| Third block |
 |
| 4th block got a different colored hexagon in the center using a warm pink with magenta and white then the flower background with oranges purples and magenta pinks. |
In this 4th block I was ready to take a step aside from the aqua purple theme and move back to the pink purple orange end of the range of colors. I am not sure why but it felt right when I headed in this direction looking at all four it needed this brightness.
 |
| Three of the 3 inch central hexagons trying a new orange magenta color theme in the center hexagon. |
Then I wanted to throw a twist in and added a block with a diamond setting of the central hexagon. It was fun and a little tricky to add triangle blocks split in two...
I blogged earlier about messing this one up at our guild sewing day. I cut that orange edged block in half the wrong way first thing and had to start it all over when I got home but that is a good example of how much thought and concentration is required to get the results you want in quilt top piecing. This is how they looked before I cut them in half to create a triangle to add to the diamond block center.
The various blocks all improvised pieces totaled nine which took a while to even up with extra rounds of thinner and thicker bands. In the final judgement I chose to add some solid magenta as sashing to draw all these unmatched blocks together to make a top to fit my queen sized sleigh bed.
I was influenced by the hand work movement to make up some one inch English paper pieced tumbling blocks to include as a sort of button decoration on the intersections of the sashing. I wanted to add some scale to the theme small and large.
 |
| one inch and three inch English Paper Pieced blocks in the quilt side by side |
They were so small that I had a struggle to figure out how to get them on the intersections of the sashing and decided that applique was my best bet once the whole was hand quilted. I chose # 8 pearl cotton in contrasting or matching colors to detail the big blocks and surround them on the sashing leaving room for these small tumbling blocks at the intersections.
 |
| Hand quilting with big stitch purple pearl cotton # 8 |
 |
| quilt top before the quilting began laid on my bed with four tiny one inch tumbling blocks at intersections |
 |
| detail of finish |
 |
| detail of finish hanging |
 |
| detail of central block finished |
 |
| Finished hanging by my bed (see the foot board lower left blocks the full view) |
 |
| Hanging Tumbling block quilt improvisation based on the original "Add a Border" block from Ed "Cattail" of the block swap group. |
I wanted to thank Ed Hart for the inspiration and Dustin Cecil for sending me this block that has kept me busy for the last couple years. I regret that my home is kind of small and tight so the finished quilt shots are cramped but maybe next weekend when I show it at the Washington DC Modern Quilt Guild meeting I can get a better photo to add later.
I would love to hear your comments and questions on my blog posts about quilting or any other topic I cover. Be aware if you do comment I have this blog set for all comments to be approved by me before they will appear on the site. It might take a day or two to get to them and post them thanks for your patience.




 Posts
Posts


